
Post Drywall Air-Sealing
How to Air-Seal Your Home after Drywall has Gone Up
Post-drywall air-sealing is the process of creating a continuous air-barrier between the conditioned and unconditioned spaces of a home after drywall has been installed. This application is useful in homes that have old or faulty air-sealing, or for homes that don’t have any air-sealing at all. Traditional sealants have very short lives, even if the label says something promising like “10 year Lifespan!” In addition, if the wrong sealant is used, a low-quality sealant is used, or if the sealant is met with temperatures outside its tolerance level- it could shrink and negate any potential benefits.
To be clear, post drywall air-sealing is not an “ideal” application. It is more akin to a last resort or a bandaid- but it is also much better than nothing. In new construction, this application should never be necessary, because the exterior air barrier would have been properly installed and air-sealed before drywall goes up. However, if you do experience cold drafts in your home, or if your home never seems to stay warm or cool enough, then post-drywall air-sealing may help you out.
The following is a list of the most common places for this application, and how to seal them.
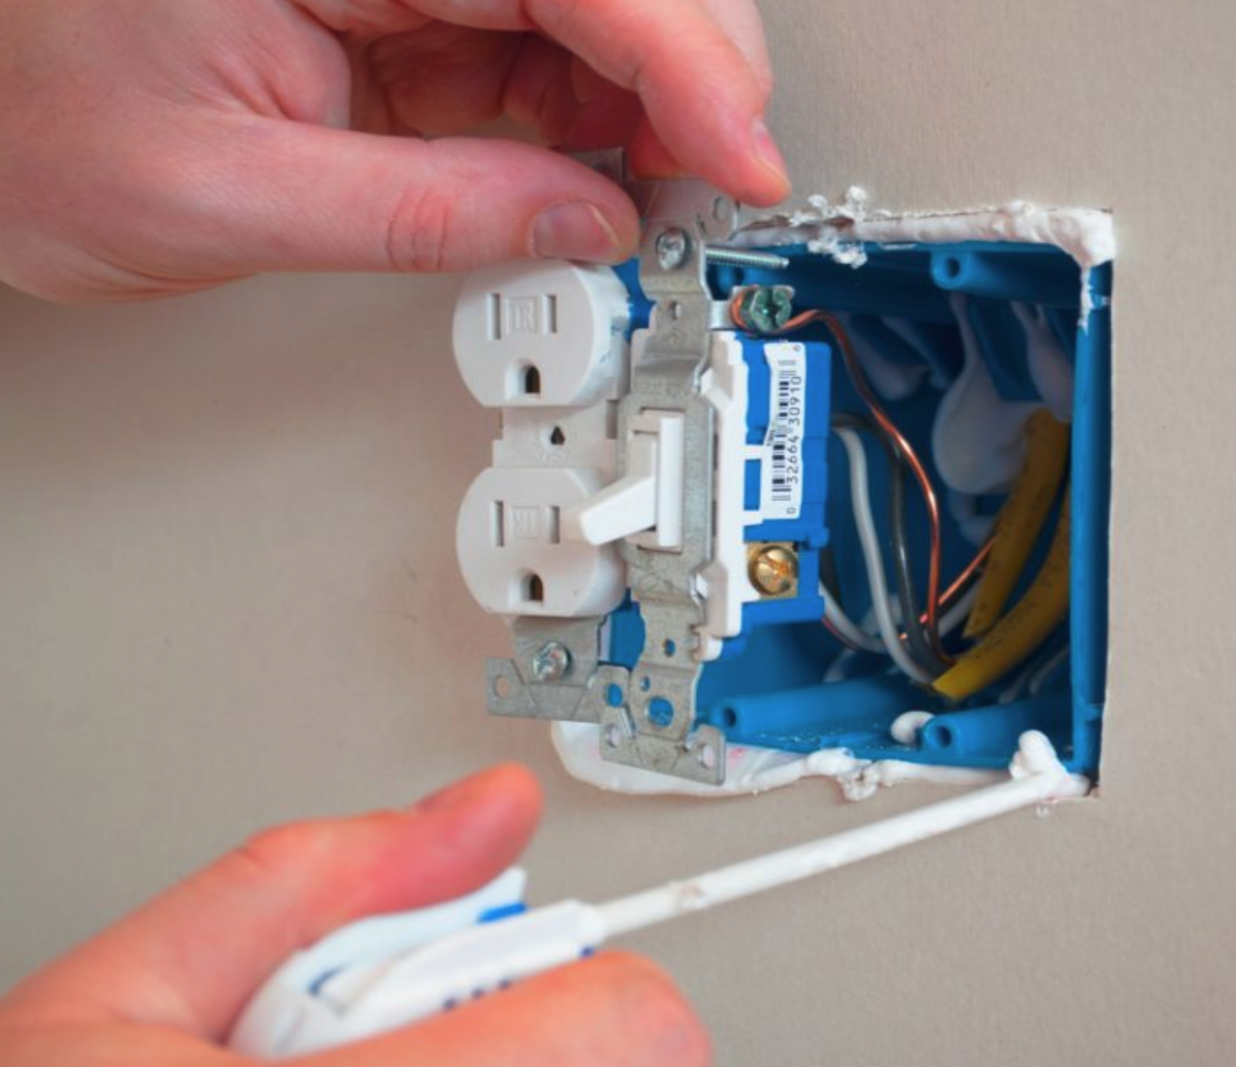
1. Gang Boxes
Please note- to work safely on gang boxes, the electricity will first have to be shut off. Work with an electrician or other professional to ensure your safety as you air-seal this part of your home.
After shutting off the electricity, remove the face plate. If you look closely, you’ll see holes in the gang box through which the cables go in and out. These are the holes that can be sealed. With can foam, stick the tip of the nozzle up into those corners and apply enough foam to close them. Next, you can seal around the edges of the gang box, right up against the drywall (see photo). Even if the drywall was cut well and is flush with the box, air can still pass through. After sealing, the faceplate can be immediately replaced.

2. Pipe Penetrations
This application is most common under sinks in the bathroom and kitchen. Run and check- is there a gaping hole through which your under-sink pipes pass? Maybe the gaping hole is covered by a tiny plate that looks nice but doesn’t prevent air infiltration? If a tiny plate is present, simply slide it away from the hole. Seal around the pipe penetration completely, ensuring that you are sealing the penetration in the wall and not only your cabinet. Replace the plate if present, and voilà! Your pipe penetration is now sealed.
In this picture, the entire area inside the green line would need to be sealed (including behind the other side of the pipe).

3. Windows and Doors
Unfortunately, not all windows and doors are sealed well during the construction process, if at all. And more unfortunately still- after construction is complete, the only way to seal around windows and doors is by removing the trim. If you are planning to reuse your trim, you must be careful when you pry it off to avoid scratches or breaking it in half. Once trim is removed, however, you have an easily accessible opportunity to improve the air barrier between indoors and out. Using can foam, seal between the framing of your house and the frame of the window (see green line below). While you should avoid getting can foam on your walls and the window itself- in the space between window and framing should be completely filled with foam as it will get covered by trim.
4. Trim
In this section we are referring to the trim at the bottom of your walls. Since this trim covers the space where floor and wall meet, it hides the gap between the floor and the bottom of the drywall. There are two ways to do this. You can remove trim and seal right at the meeting place of the floor and drywall, or- you can leave the trim where it is, and carefully seal the top and bottom edges with clear caulk (note: this application is only possible for solid-surface floors).
Despite the caulk being colorless, a careless job will still be left looking less than desired. This application is recommended for those who have steady hands (or who have friends with steady hands) and who can complete a nice job on a finished surface.
5. Vent Penetrations
All vent penetrations should have been sealed during the construction process. However, if your house is old or if you are having temperature issues, this may be something to check on.
If you have a finished basement, you can walk around the outside of your house and check all vents and penetrations for sealant. This would be things like exhaust pipes, air conditioner penetrations, laundry vents, etc. Can you see into or around the space between pipes, cables, or vents and the exterior walls of your house? If so, grab some weather-proof caulk and seal around these protrusions, effectively closing off the inside from the outside.
When selecting weatherproof caulk, make sure it can withstand the range of temperatures in your area, that it has a long lifespan, and that it can be effectively applied in current weather conditions.
If your basement is unfinished, you’ll likely be able to check from the inside. On a sunny day, take a peek at all the penetrations listed above. If you can see daylight coming through the openings, they’re not sealed correctly.
6. Other Electrical Fixtures
In a perfect world, electrical fixture penetrations would always be sealed from the attic before insulation is installed. And while this is becoming more widely practiced, it definitely wasn’t a consideration in most non-modern homes (and isn’t even in a lot of modern ones, too). This application takes a bit more patience, skill, and tools as you’ll need a ladder and you’ll have to turn off your electricity. The essence is the same as everything listed so far- remove the fixture, seal the gaps, and replace. This can also be done for any wall electrical fixtures. An important consideration beforehand, however, is how much heat is produced by any particular light fixture. For incandescent lights, we don’t recommend this application unless you are using a fire-rated product. Before doing any sealing around light fixtures, make sure you use a compatible and approved sealant.

7. Sill Plate
Use a weather-proof caulking to seal the bottom sill plate of the house with the foundation wall. Depending on the house, you may need to remove the bottom row of siding to do this. This not only will help to lessen air infiltration issues, but will also greatly reduce the possibility of insects getting into your home through any potential gaps.
8. Any Other Gaps or Holes in the Drywall
Any penetrations through the drywall that we haven’t listed here- such as holes from accidents, old screw or nail holes, ceiling fans, doorbells, thermostats- can be sealed in much the same way as items described earlier in this article. Getting down to this last list could be considered nit-picky, and diminishing returns definitely start to creep in. However, as a last resort, finishing all items on this list will reduce the amount of air infiltration your home experiences. Temperatures will be more stable, and there will be less of a drain on your mechanical equipment.
Post drywall air-sealing in your home might seem like a daunting and tedious process. And while it may actually be tedious, it doesn’t have to be daunting. Go slow and take one step at a time. If you’re building a new home and want to avoid this type of application in the future- call us! We’ll make sure your home is properly air-sealed before drywall goes up.